Creating a New Breeding Program
To start a new breeding program in BIMS, you must have an account for the community database with the appropriate access level. The first step in creating a new program is to select the appropriate crop. To change crops, click the "Crop" button in the header (Fig. 18A). Then select the crop from the list on the "Crop" tab (Fig. 18B). When the new crop is selected, the "Manage Program" tab will open and then you can open the "Program Admin Menu" section (Fig.18C). Click "Create" to make a new program.
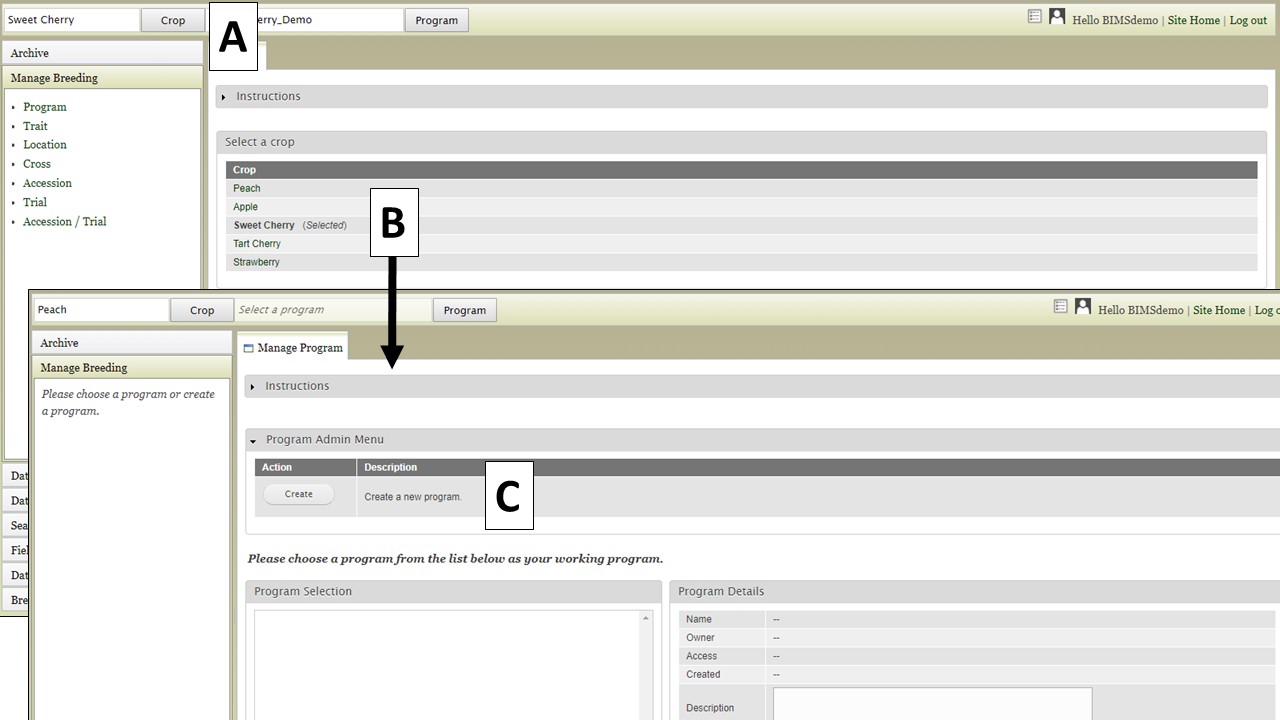
Figure 18. Switching crops and opening the Manage Program tab.
After clicking the "Create" button, the "Add Program" tab opens (Fig. 19A). Enter the new Program Name and make sure that the required column names are set to match your dataset (Fig. 19B). The four columns are required columns in phenotype sheet of the data template and if you change the column names here the column names in the phenotype sheet of the template for download will automatically change. If you use Field Book App for phenotype collection, use these column names in the input files. After you have created the program, you will have the option to add other database account holders as members of the breeding program (Fig. 19C). Once the program is created, data can be loaded to the program.
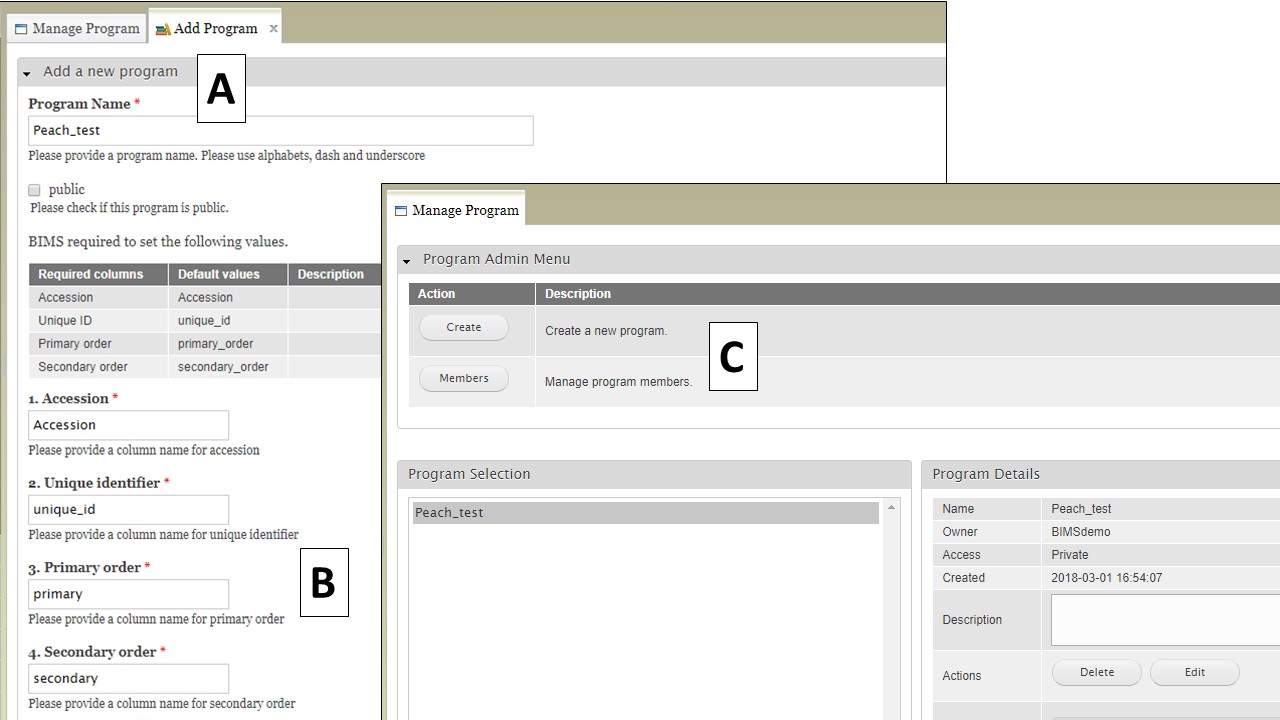
Figure 19. Creating a new program and adding members.