Viewing Data
To view data that has already been loaded into BIMS, you first need to select a crop if the community database has data for multiple crops (Fig. 2A) and then choose the breeding program (Fig. 2B). Once the selections have been made, the selected crop and program names will appear in the upper left corner of the BIMS window (Fig. 3A). You can change the crop or program by clicking on the buttons in the upper left corner.
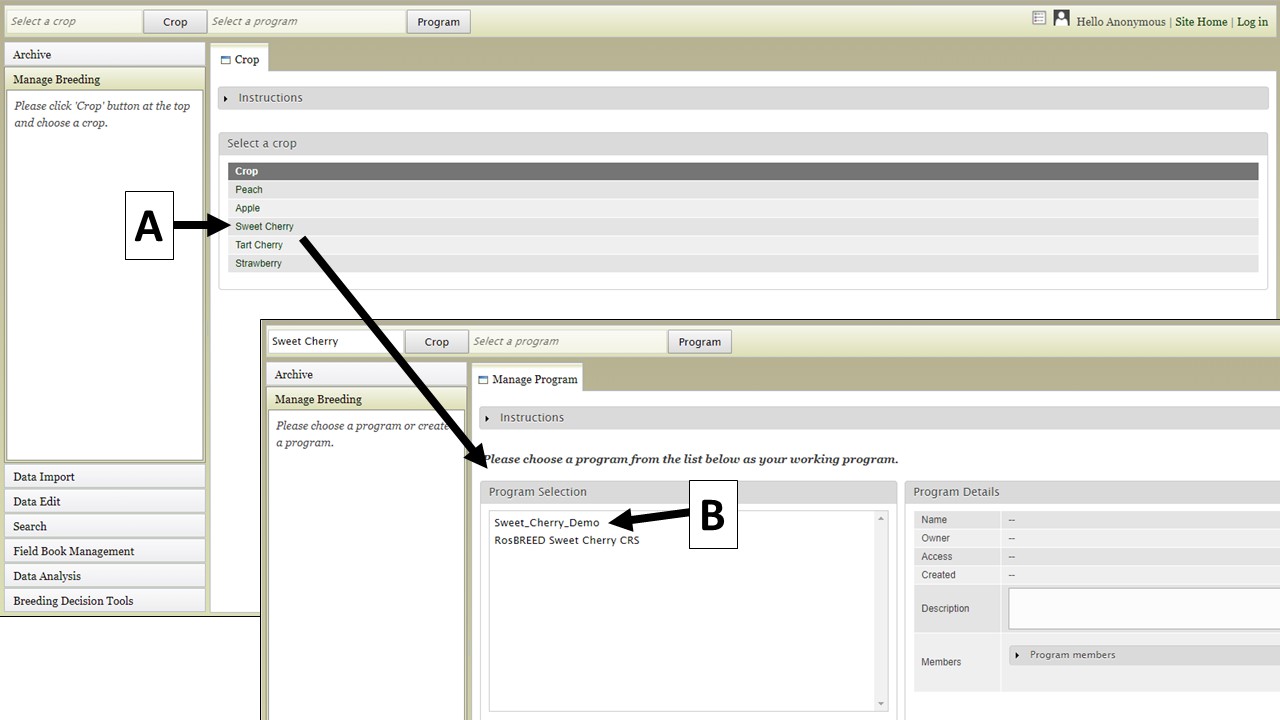
Figure 2. Selecting the Crop and Program in BIMS.
There are three main areas of the BIMS interface. The first part is the header region (Fig. 3A) which displays the current crop and program, allows users to change crop or program, has a link to the homepage of the community database (Site Home), and displays the user name. The second part of the interface is the accordion menu on the left side (Fig. 3B). This menu allows users to switch between different sections of the BIMS program. The last region is the tab region (Fig. 3C) and this is where users primarily interact with BIMS. Each tab in BIMS has an "Instructions" section that can be expanded by clicking on it. The "Instructions" have information on how to use that tab.
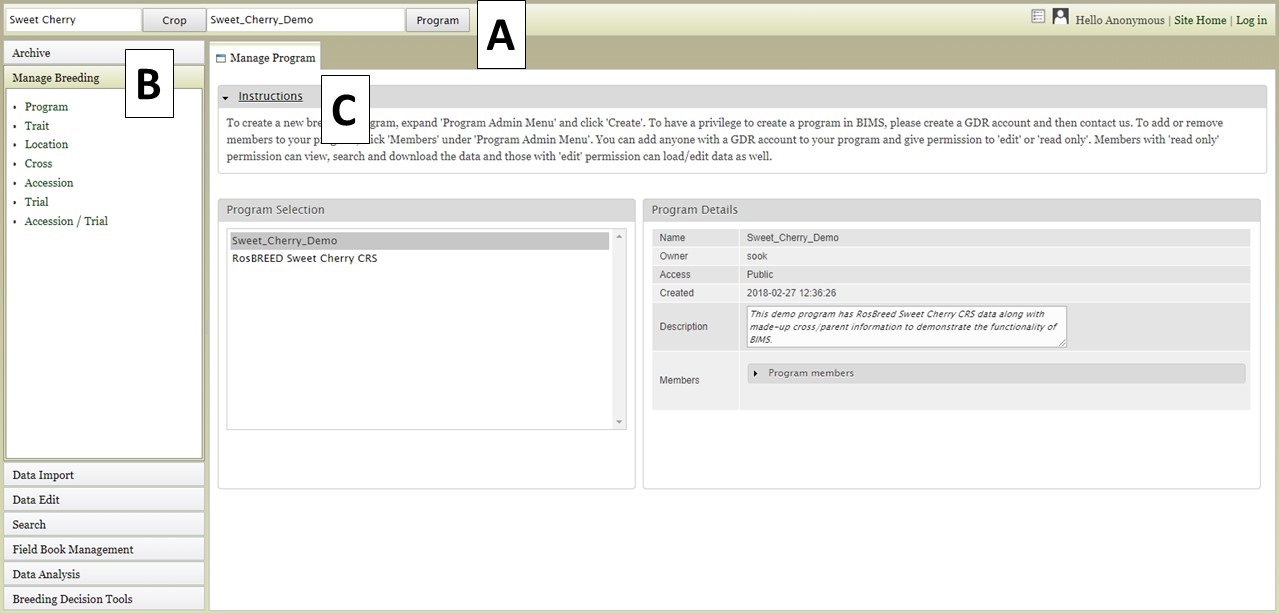
Figure 3. The main parts of the BIMS interface.
Once the crop and program have been loaded, you can explore the data that have been loaded into BIMS by clicking on the "Manage Breeding" section of the accordion menu. Under "Manage Breeding" there are links to view information about the Program, Trait, Location, Cross, Accession, and Trial. To view information about a certain trait, click on "Trait" (Fig. 4A) and the "Manage Trait" tab will appear. In that tab, click on the trait of interest (Fig. 4B). Once a trait is selected, the "Trait Details" will be displayed (Fig. 4C).
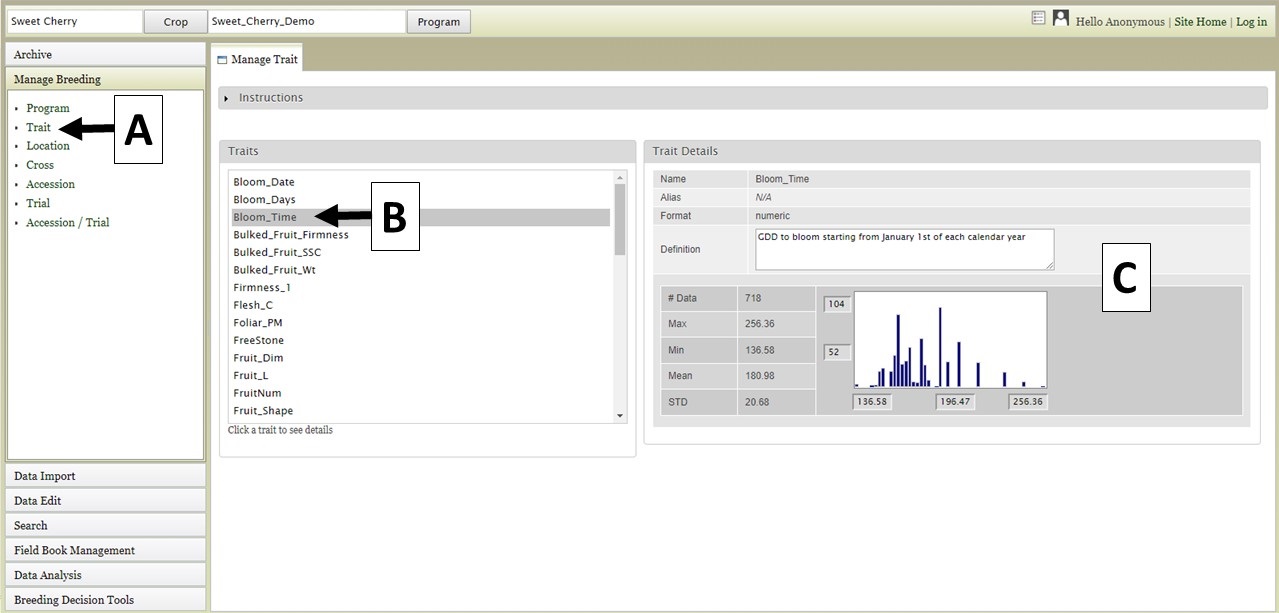
Figure 4. Selecting and viewing Trait Details.
If you are viewing data from a private breeding program, you can also edit the information for all the items under manage breeding. Breeders with private breeding programs will also see an "Actions" section (Fig. 5A) on the details sections for the trait, cross, etc. The "Actions" section allows breeders to edit the properties or delete the item. Below is the description of what will be deleted by clicking 'Delete’ button in each section.
- Trait page: all the trait values associated with the trait descriptor as well as the trait descriptor
- Location page: all the trait values associated with the location as well as the location name.
- Cross page: the parent information for the progeny of the cross as well as the detailed data of the cross
- Accession page: all the trait values associated with the accession as well as the accession details
- Trial page: all the trait values associated with the trial as well as the trial name
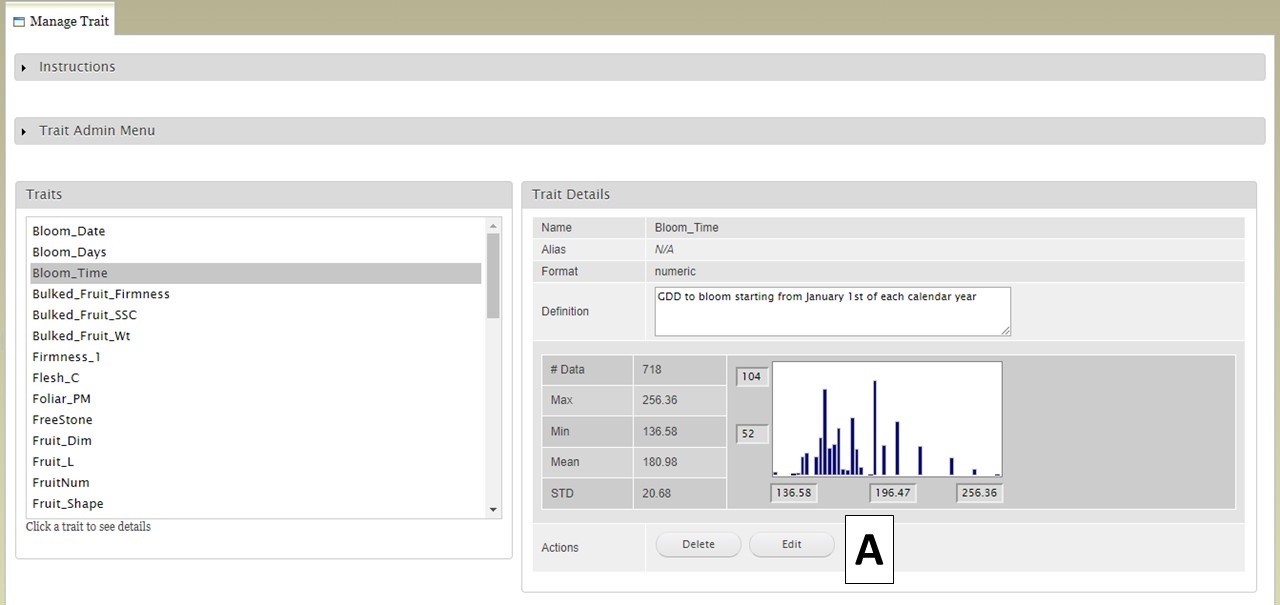
Figure 5. Editing abilities available to breeders with private programs.
You can also view information about the other data types under "Manage Breeding" by clicking on each type. For "Location," information about each location can be displayed. First select "Location" (Fig. 6A), then choose the location name (Fig. 6B), and then the details will appear (Fig. 6C).
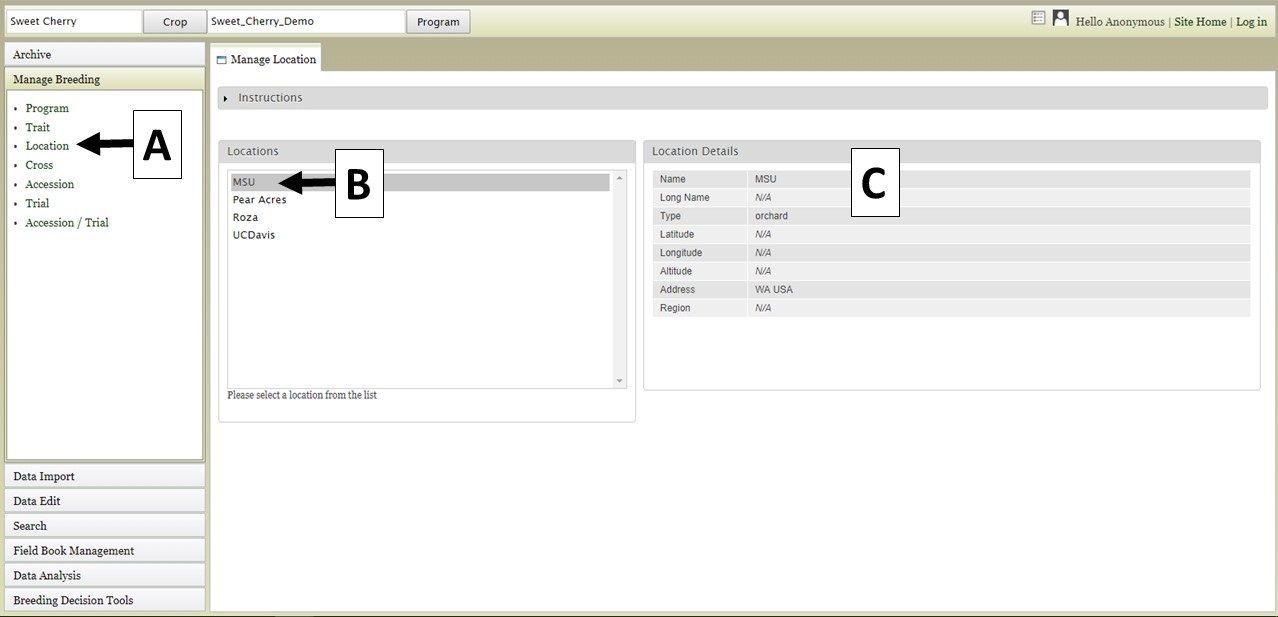
Figure 6. Location details.
For the "Cross" (Fig. 7), "Accession" (Fig. 8), and "Trial" (Fig. 9) data types, the data details are accessed the same way. First select the data type under "Manage Breeding" (Fig. 7A-9A), then select the one of the names (Fig. 7B-9B), and then the details will appear (Fig. 7C-9C). For these data types, in the "Details" section there is also a "View" button that opens another tab that displays further statistics/data.
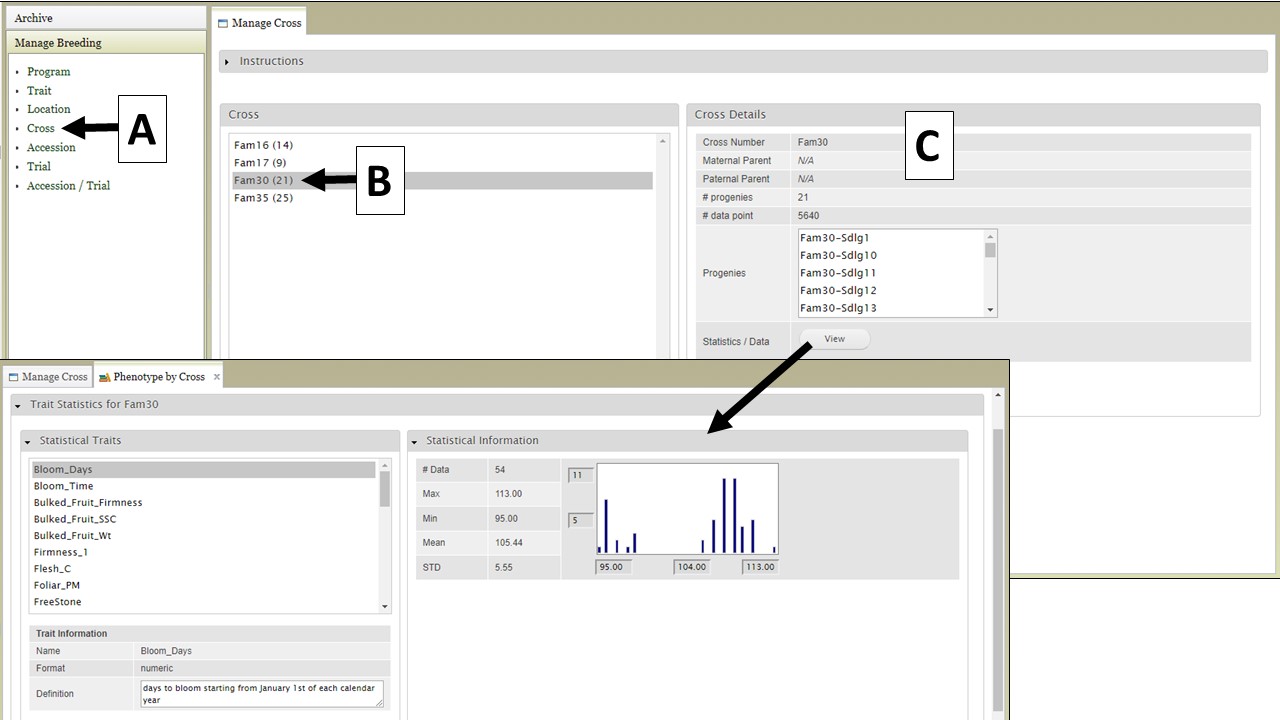
Figure 7. Cross details.
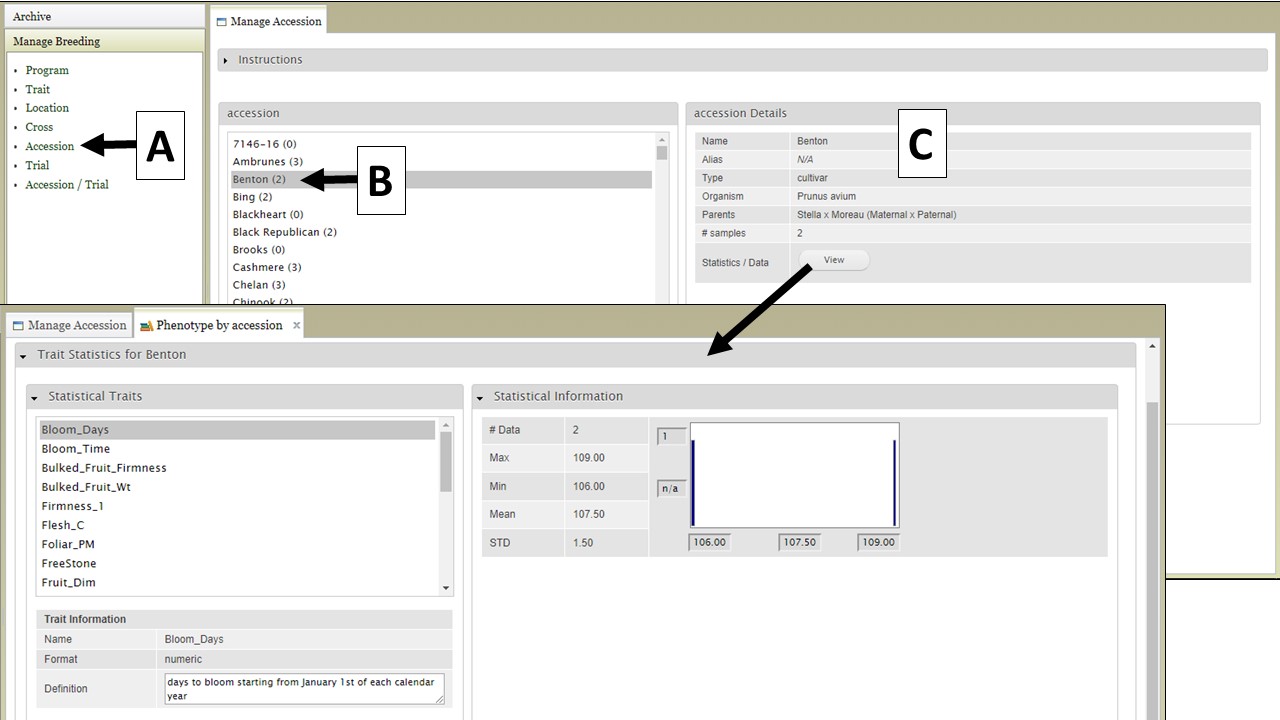
Figure 8. Accession details.
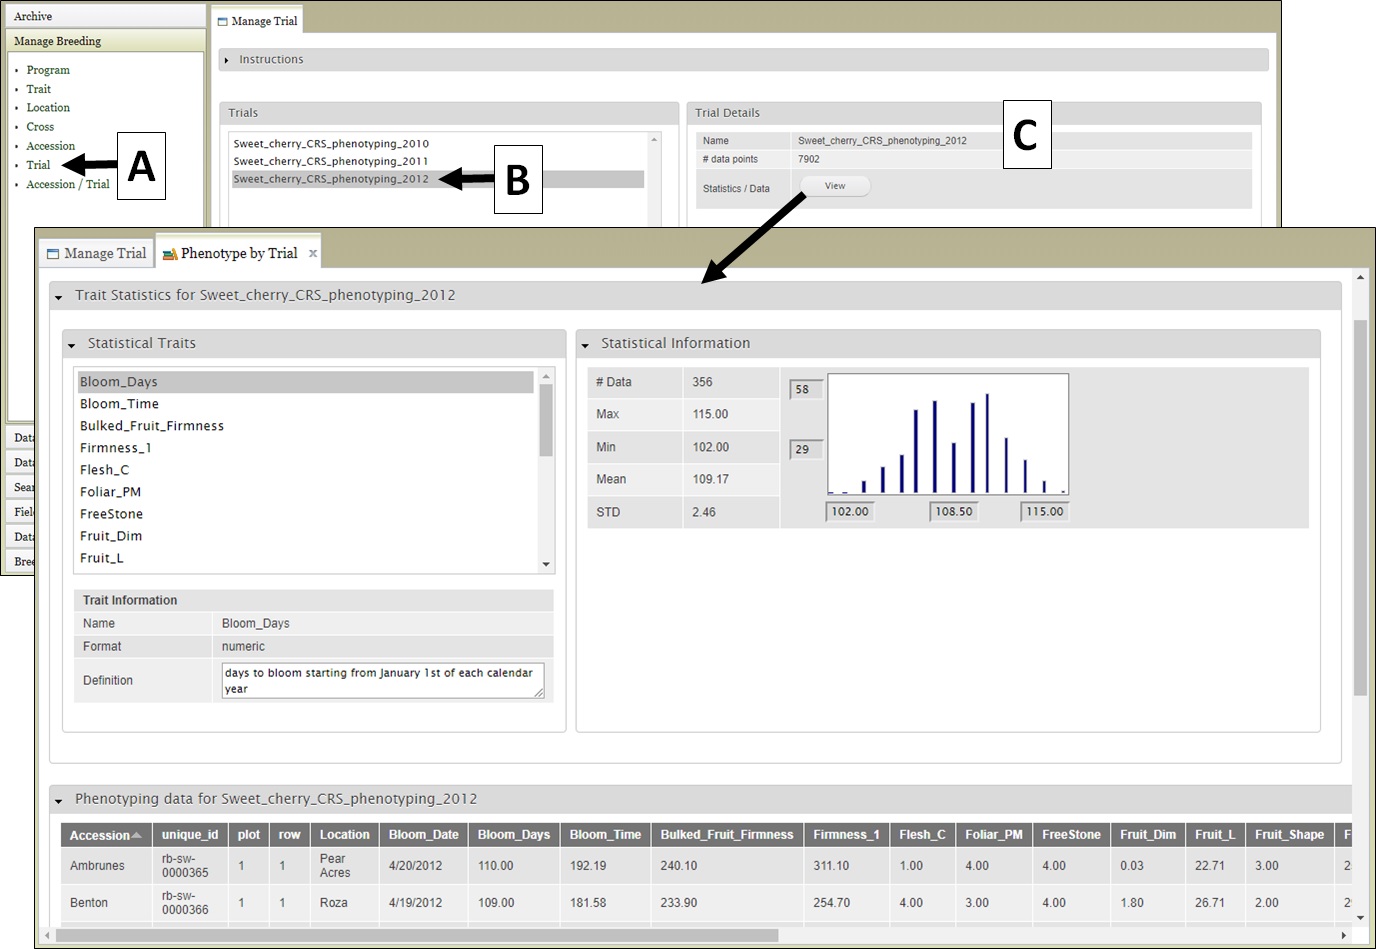
Figure 9. Trial details.